Monday, 25 September 2017

Sew My Own Maternity Wardrobe: Mama Agnes


Hello. I am back to blogging, after a more than half year absence. The last seven 7 months has been so crazy. I have been pregnant! First Child. So you can imagine my excitement and how my life has turned upside down. However, that’s not the excuse for my half year absence. The winter in Melbourne this year is too cold and too long. I have chosen to stay in bed and keep warm when I should be sewing. Now that winter is truly over and I went straight back to my sewing table on a warm and sunny day.

This pattern, Maternity Agnes from Tilly and the Buttons, came out just at the time when I needed maternity clothes the most. After 30 weeks, I found most of the clothes in my closet are no longer wearable. My belly is too big! So I looked for some maternity patterns. Initially I wanted to alter Vogue 1314 into a maternity dress after seeing a few ladies did so on PatternReview, but pattern alteration or drafting is not really my strong suit so I gave up. Then I came across the new maternity release from Tilly and the Buttons on PatternReview, my search ended with this pattern.

Size and Fabric

I have been seeing lots of their famous Bettine Dresses but I had not sewn any of their patterns. So I made the top version to test out the fitting. I made size 3, according to my pre-pregnancy bust size. My first attempt was on a Grey poly/rayon jersey. My second version is a thicker stripe cotton/rayon jersey. I did not have enough stripe fabric so I made a shorter sleeve. They are both stretchy.
Grey poly/rayon jersey: 1.5m wide, 1.3m long
Strips cotton/poly/rayon jersey: 1.5m wide, 1.2m long.

Version 1 

Version 2
Fitting and Alteration

I was not happy with the fitting of the armholes. There seems to be excess fabric at the joint of the shoulder and sleep cap. So when I made a second version, I used the armhole of the Sewaholic Renfrew top. The Renfrew top has a higher armhole, and smaller neckline. After washing both garments and wearing them, I actually think the original pattern fits well too. So when I make it next time, I won’t alter the armholes.

One thing I am adamant to alter is the gather of fabric on the top front. As the gather starts at the bust line, there is an excess of fabric between the underbust and top of the belly. So I moved the starting point of the gathering down by 1 inch and made more gathering below the waist on my second version. It fits much better.

I also shortened the hem by 1 inch.


Construction

I dived into sewing knits recently. Before making this top, I watched the T-shirt making class by Marcy & Katherine Tilton on Craftsy. I learned a few tips and applied them to this top. I really don’t like the instructions of Tilly and the Buttons. The illustrations for the steps are actual photos, not diagrams. I found it’s confusing and not clear. Luckily it’s an easy project. I am not sure I will buy their patterns again given the instructions are not clear for me.

The instructions usually tell you to stitch two lines in the seam allowance and pull them to make a gather. I prefer to stitch one line on each side of the actual stitch line for the gather, then I sew the actual stitch line in between the two gathering lines, as shown below.


Conclusion

I Iike this pattern and the two tops made from it. It’s a very close fit so using a comfy stretchy fabric is important. I am definitely making the dress version soon after finishing some other projects. Highly recommend it if you are sewing your own maternity wardrobe.

Friday, 3 March 2017

Burdastyle 01/2017 #103: Oversized Hoodie

I made this Oversized Hoodie for Pattern Review’s Serger and Coverstitch Contest. It's based on BurdaStyle Magazine 01/2017 #103.

Style and Size
After I cut out the fabric, I realised the body of hoodie was going to be HUGE. I was a bit disappointed because the hoodie on the photo in the magazine is quite slim. The model used her arms to hide all the excess fabric at the side seams. I did learn something from sewitgorgeous's review, saying it's very big and better to make it two sizes smaller. I didn't think I would mind a big hoodie so I cut my size 38. Well.. it turned out to be really big but I am OK with it now. It's actually quite comfy. I can still wear it out to the mall.


Fabric
I bought 2 meter of sweater knits from Spotlight for $7. I only used 1.5 meters of sweater knits in the project.

I used recycled rayon knit for the lining of the hood. It's my first time to recycle fabric from my unwanted clothes. I am very satisfied and I want to do that more in the future.


Construction
I have been hesitating on what project to do solely on the serger and coverstitch. I normally use my Bernina 440 to sew everything and only use those specialty machines to neaten the edges and do the hemming. 

As I started sewing my knits this year, I realised 4-thread serging is actually very good for knit seams. I used to stitch a 5/8" seam allowance on the conventional sewing machines then trim the seam allowance off on the serger. When I made my Renfrew top, I cut only 3/8" seam allowance and sewed it straight on the serger. In that process, I needed to eyeball while feeding the fabric so it cuts away 1/8" seam allowance.

I am glad I joined the contest. It forced me to practise stitching seams on the serger. I learned some tricks with my serger and coverstitch machine. For example, when starting to sew the pointy layers at the beginning, I trim away 1/8" S.A. so that I can tuck it further in under the presser foot and the fabric is fed smoothly.


With my Babylock coverstitch, I also used the bottom side of the coverstitch as a top stitch for the front pocket and the hood. It's a bit fiddly and my Babylock does not have much room on the right hand side of the needle. The top stitch turned out great, though.


Conclusion
So it turns out, the hoodie is oversized. But who cares?! It's comfy and just looks like other hoodies when I wore it out shopping. I also like the colour very much. Overall, I am quite happy with the end result despite initial doubts.


Sunday, 26 February 2017

A Cynthia Rowley Peplum Tunic: Simplicity 1104:


I am always a fan of Simplicity's Cynthia Rowley Collection. I made a dress from her collection (Simplicity 1873) a few years ago and I was happy with it. I was initially attracted to Simplicity 1104 by the deep V neckline and the big pleats and fitted princess seams. I had lots of confidence in the pattern before I started sewing it.


Style
The top (or dress if you keep all the length to the knees) only consists of 6 pattern pieces including those of the lining. The main fabric front is one piece and so is the main fabric back.

There are darts and princess seams on each side on both the front and the back, which contours the waist and the bust. There are pleats on the bottom of the darts and princess seams. The design is very flattering.


Pattern Alterations
I read the reviews and most people recommend raising the V neckline. I used size 14 neckline because it sits above size 10 on the pattern as recommended in velosewer's review.

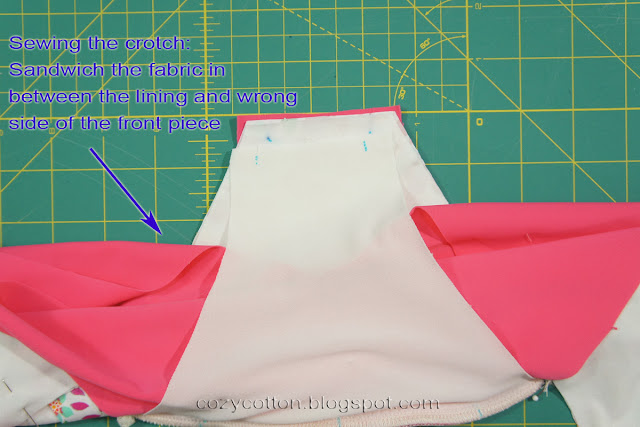
The lining only lines the top. I hate half lined garment. So I redrafted the lining pattern pieces  by overlapping the original lining pattern on the folded main fabric pattern and traced the remaining length on the main fabric pattern. Here is a picture showing how to extend the lining pattern.


I did not add bias binding on the hem. Since the top is a bit too long for me, I folded up 3 cm from the bottom edge and hand stitched a blind hem. 

Sizing
I cut a size 10, although my measurement is a 12 bodice and 14 from the waist according to the envelope chart. I made a size 12 (graded to 14 from waist) muslin but it turned out very big.  So I made a full size 10. It turned out the waist is a bit too tight. I should have added 1/4 inch at the side seams.  

I think the armholes are a little too big for me. Not a big issue but little thing I can improve if I make it again.

Fabric
I used only 1.1m  Double Face Satin  (150cm wide), and 0.75m lining (also 150cm wide). I found fabric that holds some body makes the pleats look better.

Construction
I quickly made a mistake by gluing the neckline interfacing to the main fabric. The interfacing should be attached to the lining! Oh Well.. Lesson learnt - Always read your instructions before sewing!


Bottom of the darts and princess seams and sewn up to create darts. I love pleats but I don't like sewing pleats. There are a few short stitches here.

An invisible zip was installed on the centre back. It's good to leave a couple of inches on the neckline from the centre back unstitched so the invisible zip was installed neatly.


I use pinking shears to trim the edges because the top is fully lined.


Conclusion
It’s a very flattering peplum top. The darts and the princess seam contour the bust and the waist very well. It is clinching the waist and has lots of volume below the waist.


I didn’t own any peplum tops so it’s good to have one now, but I don’t think it’s for pear shapes. I found peplums tend to make hips look bigger. It would be nice if you have long and skinny legs below it to balance the accentuation of the hip, but the pear shapes have big thighs and short legs. IMO it just makes pear shapes look more “pear”.  Nonetheless, I still want to make the dress version of this pattern to see what it will be like.

Wednesday, 15 February 2017

A Tale of Two Swimsuits

I always wanted a pink swimsuit. When I saw Pattern Review's Activewear Contest, I said, that’s it, it’s time to make a swimsuit. I had NEVER made a swimsuit before, and had zero idea of how difficult it could be. But the optimistic me thought that there are so many online resources nowadays and I could learn, so I took the plunge.


Finding the pattern, learning the skills, choosing fabric and supplies...
I started with last year’s PR contest winner treefrog’s Swimsuit. I really like the design of that swimsuit. I tracked down the seller (also the designer) of that pattern on Esty. I locked my eyes on this swimsuit pattern because: 1) the underwired cups and lapel/turn-back are so eye catching 2) the design is quite unique and modern without straight side seams. So I ordered the patterns all the way from the Netherlands.  

As I was determined to make this swimsuit, while waiting for the pattern, I started reading blogs about bra making.  I got a little bit of an idea what the components of my bra were, but I was still so confused how to install the channelling and sewing the cups.


Two weeks later, I received the pattern in my letter box. I was excited to open the pattern but soon disappointed and stressed after I found out the sewing instructions were like the Burda Style Magazine type – concise, only words and NO ILLUSTRATIONS. I read the instructions many times and I just couldn’t understand and visualise all the steps and the materials.  I GOT STUCK.

The breakthrough is when I posted a question on Melbourne Spoolettes’ FB page (closed group) asking other group members where to source the materials and tips for making swimsuits. One of the ladies recommended the Closet case’s Sophie swimsuit pattern and their online workshop.
I enrolled in the course and it comes with a free pattern. I was surprised. This is the best money I spent on an online sewing course ever! It’s so well presented and extremely informational for a beginner like me.

By then I had met with Georgina at Sewsquirrel.com.au (also recommended by the ladies on FB) She helped me with buying the supplies I need. She explained to me what power net, bra foam and swimwear lining are in great details with the actual product. Combined with the online workshop, I can imagine putting together my swimsuit.

The Remnant Warehouse has a great range of chlorine-resistant swimwear lycra. Most of the printed ones come from Jets Swimwear, a premium Australian swimwear brand. I ordered the

Making it… Muslin #1 Sophie Swimsuit
Initially I only planned to just watch the videos for the bits that I needed for my swimsuit project. I ended up watching the whole course and made a sample of the Sophie Swimsuit. Heather, the presenter, is such a well-spoken and hands-on teacher. She really inspired me to give it a go with her Sophie Swimsuit.
Sophie Swimsuit.... First swimsuit I ever made.

This is the first swimsuit I made. It’s not too bad. There are a few things I can improve on if I make the pattern again (I think I will). But, for now, I learnt some important tips:
1.     Use a walking foot for Lycra. I didn’t know until I watched Heather’s video. It makes a huge difference.
2.     Use straight stitch to sew the cups and use a serger to sew the other seams.
3.     Use clear elastic to stabilise the top edge of the cup (more details below).
4.     The long arrows on swimsuit patterns are actually stretch lines. You need to find the more stretchy direction of the fabric, which can be lengthwise, or crosswise depend on the fabric, and align the pattern pieces along the stretch line.

Finally making it… Muslin #2 my swimsuit
After practising sewing a swimsuit with Sophie (above), I still wanted to make a muslin of my swimsuit to check the fitting, and practise again.

Luckily I made this muslin, I found a couple of areas I need to improve such as the cups. As you can see in the photo below:

Finally Really Making it… the Real Swimsuit
Yay, I am finally cutting the fabulous fabric for my swimsuit.

Apart from the fitting changes mentioned above, I also make some changes on the construction:
1.     I added a power net to line the upper cup (see the photo below)
2.     I added a swimwear lining to the front body piece and the shoulder straps because the printed fabric is thinner than the plain one.


So it’s done


I would really like to wear it to the beach and take some photos, but I only finished it today and I need to post it up for PR’s activewear contest. However, I will put up some photos once I have a chance to go to the beach.

Conclusion
The past month is such a steep learning curve for me. I really enjoy the whole learning experience, although sometimes it’s a bit stressful with a deadline at the back of my mind. Like making my wedding gown from zero knowledge a few years ago, this is such fun learning a whole new skill and it’s really encouraging for me to take on any project in the future. I am looking forward to starting making my own bras.

Happy sewing.
Cloud is such a good companion

Sunday, 5 February 2017

Late to the Renfrew Top Party

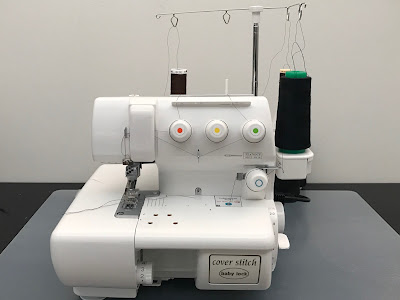
I am really late to the Renfrew Top Party, although I have had this pattern since three years ago.  The main reason I hadn’t sewn it is because I kept avoiding knits and only seriously wanted to starting sewing it once I bought a coverstitch machine. I did buy a Janome CoverPro a couple years ago, but I wasn’t fully satisfied with it. I could have given a lengthy review about the machine and that will only discourage you from getting one.


So fast forward to the beginning of 2017, I was frustrated by my CoverPro enough to have the courage to buy a brand new Baby Lock BLCS-2 Coverstitch Machine. I spent big $$ for it. I wouldn’t say it’s worth every cent because Baby Lock’s prices are highly inflated in Australia, but it’s a GOOD coverstitch machine. I finally have all the motivation to make my first Renfrew top (I reckon there will be more).


Size
I cut size 6 although my measurement is a size 8 according to the size chart. I didn’t make much adjustment except shortening the sleeve by ½ inch. I am happy with the fitting.


Fabric
I am not familiar with the different types of knit fabric. I can’t tell what fibres are in this fabric. The fabric is very comfy and warm. I use 1.2 metre @ $4/metre.

I always try to match the stripes at the side seams if I am sewing stripe fabric. It just looks much better.

Stripes at side seams matched.

Construction
The construction is very straightforward. Most of the knit fabric patterns give 5/8 inch seam allowance. At the beginning, I followed the instructions and sewed 5/8" S.A on my sewing machine, then I ran it under the serger, trimming off 1/4" S.A and left a narrow S.A. I found this a bit time consuming. So when I did the waistband (the last seam of the project), I just stitched on the serger, eyeballing 1/4" seam allowance to trim it off. It is actually really easy and saves lots of time. I think I need to get used to sewing knit fabric directly on the serger from now on.


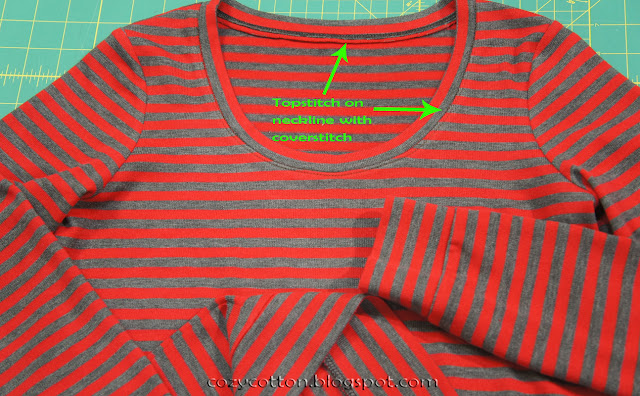
At the neckband, I made good use of my babylock coverstitch.


Like all my other Sewaholic projects, I always want to make another one after the first. Renfrew is no exception. Plus, I love wearing knit tees.

Monday, 9 January 2017

Colette Hawthorn Dress

Happy New Year! I hope you achieve whatever you want to achieve in 2017. One of my ambitions this year is to sew at least two projects a month and upload some tutorials on my blog.

I hope you had a good break. I spent lots of time sewing during in the last few weeks. I just came back from China in early December with lots of goodies (mainly haberdashery) and can’t wait to use them all. But for now, here is my review of Colette’s Hawthorn Dress.


It’s a popular pattern in 2013.  I've had it in my stash for long time. This is also my first time to sew Colette. I am not used to reading the 20+ pages of instruction. I just flipped through for the illustrations and thought of the steps as I went. You may have a different view, but for me their instructions are too pedantic.


The style

I really like the collar and the neckline. I happen to have a jumper that fits perfectly to the neckline of the dress. The skirt is very flaring. I wanted to make this dress because it reminds me of what Bernadette often wears on The Big Bang Theory.
Bernadette Style... Cute geeky look
Back and side view

The Size

I cut size 4 and graded to 6 from waist. I always knew Colette’s Pattern is more for busty women, but I underestimated how busty it was intended for. I am a B cup chest, and followed the chart to pick size 4. I thought I would be safe and did not make a muslin. Well… I was wrong. The front bodice ended up having a bit too much fabric for me. When I wore it to work, my friend pointed it out straight away for me (red face). I needed a SBA! Well… Lesson learnt – absolutely make a fitting muslin on all Colette dresses. I shortened the Skirt by 1 inch.

Not happy with the excess fabric on the front bodice
SBA done… only after I have made the dress

The Fabric


I used 2.1m (2.3yard) Japanese Lawn (112cm width) from Spotlight. For a size 4, The amount is much less than the yardage on the envelope. The lawn is good quality and I like a dotted blue floral pattern very much. It’s very light and drapey. In that sense, the skirt doesn’t have a big volume but is very flowy.

Pattern Layout for the bodice and facings

What’s next?

There were lots of sales and specials during Christmas time and I am sure lots of you must've grabbed some bargains. I bought some Colette Patterns at 30% off and McCall’s Patterns for $5 each. I am making a couple of them at the moment and hopefully I can finish soon.

Rue, McCall's M7116 and Aster
Related Posts Plugin for WordPress, Blogger...