
How often do you wear the clothes you make? My answer is - not often. So I decided to make something I can wear on a day-to-day basis. I work in the office 9-5 so formal business shirts are essential in my wardrobe. I have quite a shirt collection. Out of all my shirts, my favourite is the pair of shirts I bought in Japan a few years ago. They fit extremely well. The fabric is smooth and soft but has enough crispness to give a shape. Unfortunately they are a bit worn out. I have more reason to make my own shirts now.
I dug out all my shirt patterns from my collection. Geez, I have accumulated a lot over the years but have not made any of them. I borrowed the book Shirtmaking: Developing Skills For Fine Sewing by David Coffin. It's the best sewing resource book I have read so far. I am very glad I read it as it made my first time shirtmaking much easier.
 |
| My collection for tops.. what's next? |
I recently came across the new Granville shirt pattern from Sewaholic. Having made two of their patterns (Alma blouse and Cambie dress), I have a lot of faith in the brand. At first glance, the instruction looks very detailed and clear. I decided to start my shirtmaking journey with this pattern.
Granville shirt has all the elements of a classic shirt – Yoke, sleeve, sleeve band, collar stand, front and sleeve plackets, rolled hem. Most importantly, compared to all my other shirt patterns, this pattern is more fitted to the body.

Fabric
I used a light-weight striped-woven cotton shirting fabric. The stripes are subtle so I did not pay much attention on matching the lines but I did recut the pockets to match the stripes because they are on the front of the shirt.
 |
| Matching the strips |
 |
| Interfacing I got from Spotlight. |

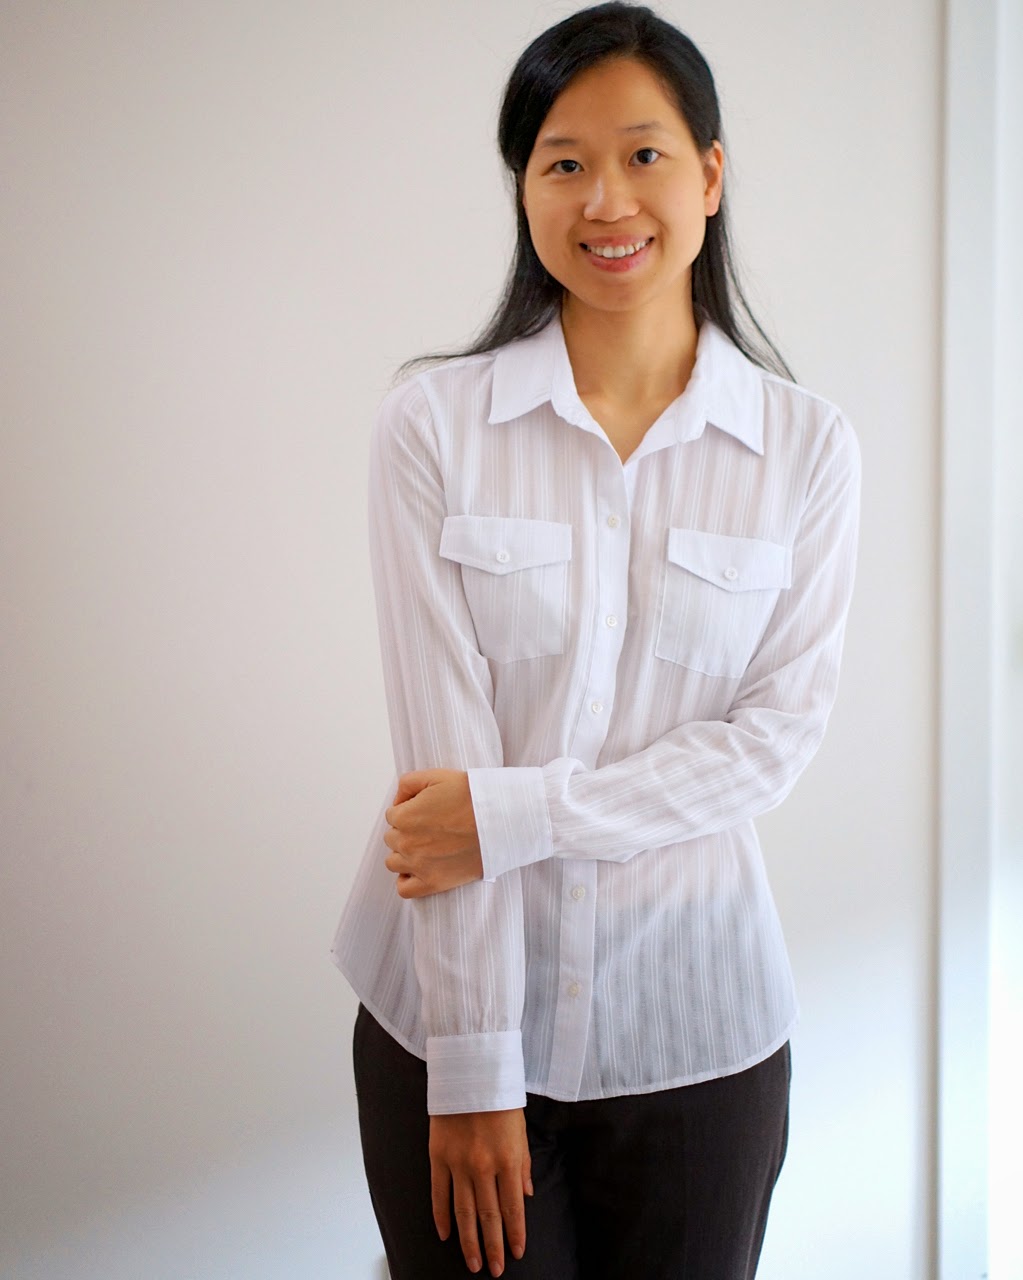
Fitting
I cut size 4 and it fits me easily, although that's the base on their size chart, I should be size 6.
Lots of the reviews are saying the sleeves are unnecessarily long. I have shortened the sleeve by 2 cm and the shirt by 1cm.
 |
| I think size 4 is right, although it still needs a bit more adjustment (commented below) |
Construction
It took me a long time to make this shirt. This is mainly because lots of the processes were new to me and I kept looking for resources and learning new skills and techniques. For instance, if you never make a sleeve placket before, you have to be patient about learning the steps, i.e. which bits to fold and press, where to stitch etc.

 |
| Sewing the shoulder seam |
For sleeve placket: ANGELA KANE Sewing TV
For a sharp collar point: grainlinestudio blog
For sewing collar and collar stand: foursquarewalls blog
Things I have learnt
- Use iron spray to achieve crisp edges.
- Press along as you sew. I found it extremely useful and give a very good result.
- Match the stripes for the pocket on the shirt front if you are sewing a stripe.
- Use good quality interfacing material
- The sleeves are still too long. I will further shorten them by another 2.5cm (1 inch) next time.
- I find the pockets are too big on my shirt. Please note there is only one size for the pocket pattern. So that means the pocket is the same for a size 4 shirt and a size 20 shirt! I pulled out my other RTW shirt and they are smaller.
- I would also like to change the shape of the cuff a little bit, just to add a small curve at the corners as my other RTW. I think it’s more practical for wearing and easier to sew.
- I also want to slim down the flaring at the bottom of the shirt and lengthen the side seams a little bit. This is because I usually wear shirts under cardigans and I don’t like excess fabric underneath.

For beginners, making a shirt can be an overwhelming process but it’s also extremely rewarding. There are lots of techniques used in there that can benefit me sewing other garments, and the end result is often surprising, mainly thanks to the neatness from the edgestitching and topstitching. I have worn this shirt to work and it's fabulous. I am totally addicted to it and making the second shirt with some Cotton Lawn (up next).
Happy sewing.
Feel free to leave comments about anything :)
Congratulations on your first shirt! It looks very well made. There's something so rewarding about making exact shirts, I think you'll come to like it quite a bit :)
ReplyDeleteThanks Carrie. I like to tops/shirts you make, so inspiring!
DeleteJust gorgeous. I have not seen a better shirt anywhere. It looks professionally made.
ReplyDeleteThanks Hopflower. I learn from this project that pressing as you sew really makes a difference on the result, and helps to look professional.
DeleteWow! Your shirt is so sweet - chic and simple/. Thanks for all the helpful hints!
ReplyDeleteGlad you find it helpful :)
DeleteGreat job on your first-ever shirt!
ReplyDeleteThanks Vireya. Your wonderful quilting projects always make me want to start quilting! :)
DeleteThat looks really great! I bought the same pattern and am in the middle of sewing up my first button down shirt ever too! I got stuck on the front button piece and had to put it down the other day. I might have a look on youtube to see if there are more instructions, and maybe a book or two I can check out. It looks great!
ReplyDeleteSame here I stopped and hopped on the internet after almost very step. I worked on it on and off for two weeks. I read your blog post but am still not sure what exactly the problem of the collar and the buttonhole piece is. In my experience, the pattern is well drafted and the notches all match well. Hope you can figure it out soon.
DeleteYou did a lovely job. I have yet to make a shirt - it scares me! - but I am just so impressed at how well your first shirtmaking went, that I think I will need to give it a chance.
ReplyDeleteYou are not alone Kelly. I too was intimidated by making a shirt at first. It did take me some motivation to start, lots of patience to go through it, and of cause there is lots of satisfaction at the end. :)
Delete