
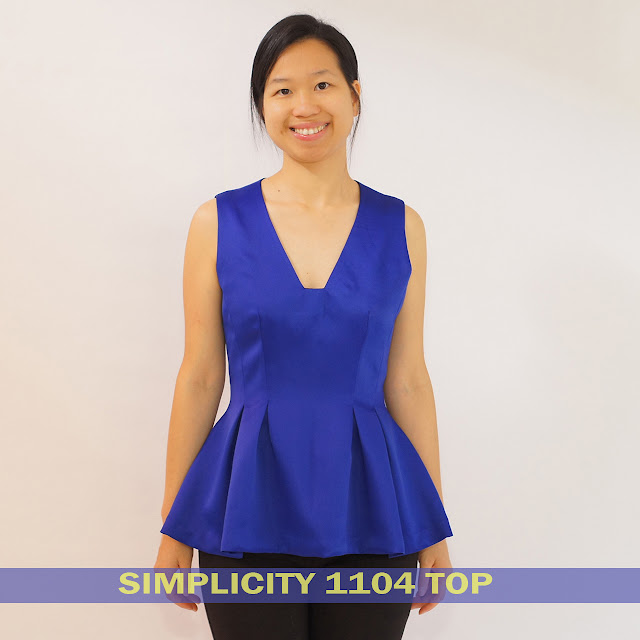
I am always a fan
of Simplicity's Cynthia Rowley Collection. I made a dress from her collection (Simplicity 1873) a few years ago and I was happy with it. I was initially attracted to Simplicity 1104 by the deep V neckline and the big pleats and fitted princess seams. I had lots of confidence in the pattern before I started sewing it.

Style
The top (or dress
if you keep all the length to the knees) only consists of 6 pattern pieces
including those of the lining. The main fabric front is one piece and so is the
main fabric back.

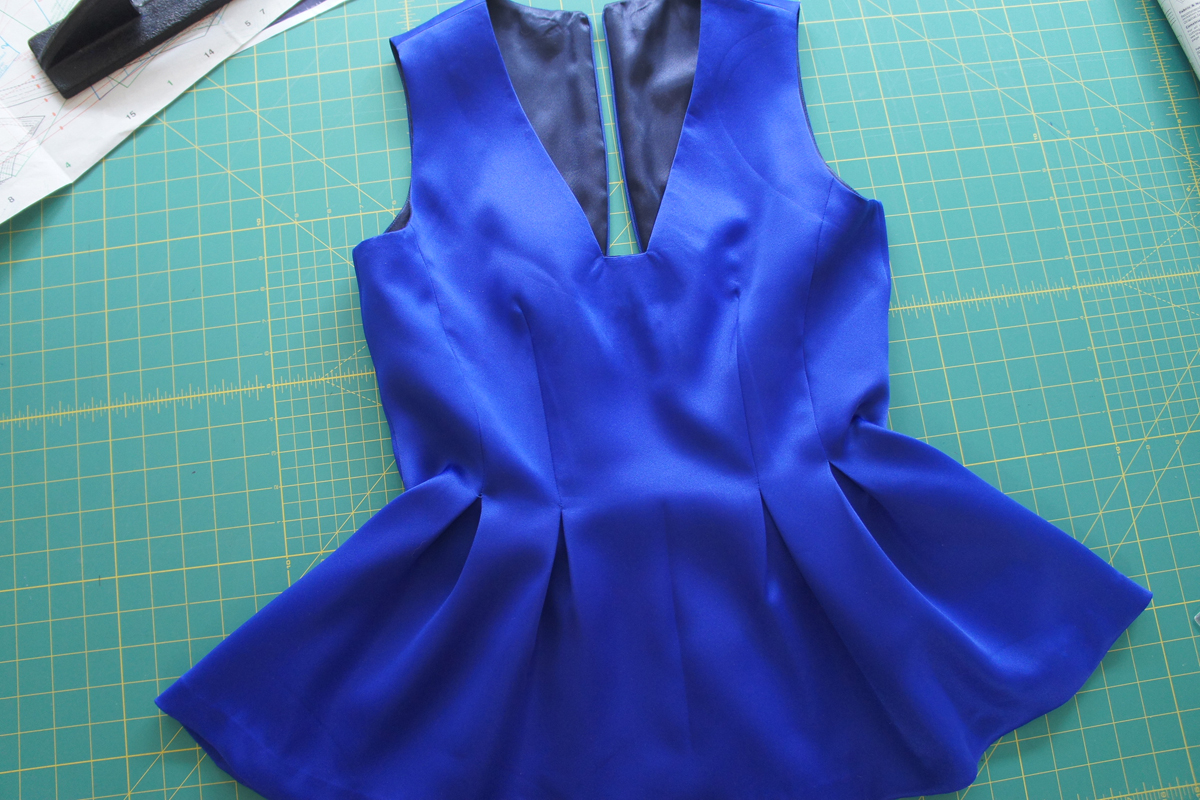
There are darts
and princess seams on each side on both the front and the back, which contours
the waist and the bust. There are pleats on the bottom of the darts and
princess seams. The design is very flattering.

Pattern Alterations
I read the reviews and most people recommend raising the V neckline. I used size 14 neckline because it sits above size 10 on the pattern as recommended in velosewer's review.
The lining only lines the top. I hate half lined garment. So I redrafted the lining pattern pieces by overlapping the original lining pattern on the folded main fabric pattern and traced the remaining length on the main fabric pattern. Here is a picture showing how to extend the lining pattern.


I did not add bias binding on the hem. Since the top is a bit too long for me, I folded up 3 cm from the bottom edge and hand stitched a blind hem.
Sizing
I cut a size 10, although my measurement is a 12 bodice and 14 from the waist according to the
envelope chart. I made a size 12 (graded to 14 from waist) muslin but it turned
out very big. So I made a full size 10.
It turned out the waist is a bit too tight. I should have added 1/4 inch at the
side seams.
I think the armholes are a little too big for me. Not a big issue but little thing I can improve if I make it again.
I think the armholes are a little too big for me. Not a big issue but little thing I can improve if I make it again.

Fabric
I used only
1.1m Double Face Satin (150cm wide), and 0.75m lining (also 150cm wide).
I found fabric that holds some body makes the pleats look better.
Construction
I quickly made a
mistake by gluing the neckline interfacing to the main fabric. The interfacing should be
attached to the lining! Oh Well.. Lesson learnt - Always read your instructions before sewing!

Bottom of the
darts and princess seams and sewn up to create darts. I love pleats but I don't
like sewing pleats. There are a few short stitches here.
An invisible zip was installed on the centre back. It's good to leave a couple of inches on the neckline from the centre back unstitched so the invisible zip was installed neatly.

I use pinking shears to trim the edges because the top is fully lined.


I use pinking shears to trim the edges because the top is fully lined.
Conclusion
It’s a very
flattering peplum top. The darts and the princess seam contour the bust and the waist very well. It is clinching the waist and has lots of volume below the waist.

I didn’t own any peplum tops so it’s good to have one now, but I don’t think it’s for pear shapes. I found peplums tend to make hips look bigger. It would be nice if you have long and skinny legs below it to balance the accentuation of the hip, but the pear shapes have big thighs and short legs. IMO it just makes pear shapes look more “pear”. Nonetheless, I still want to make the dress version of this pattern to see what it will be like.

I didn’t own any peplum tops so it’s good to have one now, but I don’t think it’s for pear shapes. I found peplums tend to make hips look bigger. It would be nice if you have long and skinny legs below it to balance the accentuation of the hip, but the pear shapes have big thighs and short legs. IMO it just makes pear shapes look more “pear”. Nonetheless, I still want to make the dress version of this pattern to see what it will be like.
This looks fantastic on you :)
ReplyDelete